Cervical Cancer Detection Using Deep Learning
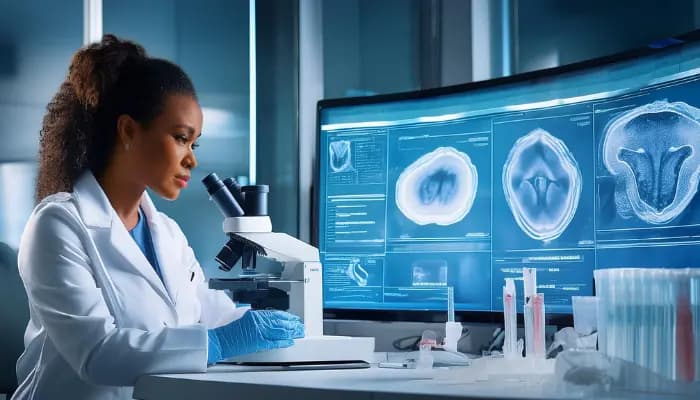
Greetings everyone and thanks for joining this engaging project. In this project, we are making use of AI for a good reason and that is Cervical Cancer Detection using Deep Learning. Well, you're here if you are a geek, or a person more interested to know how deep-learning approaches are revolutionizing the healthcare sector. The mission of this project is to help you create a cervical cancer detection system using deep learning technology.
Interesting right? Let's dive in!
Project Overview
Cervical Cancer is extremely severe and to detect and classify it without any error is very crucial. In this project, you will learn to implement a working model for cervical cancer detection using deep learning. We'll show you how to do this on Google Colab from its computing capabilities. Also, you will learn how to work with an external dataset, process the data for the tasks, and include visualization for the assessment of the model's performance.
By the end of this project, you will have a complete application that can receive medical images and output an appropriate type of cervical cancer. Imagine having the ability for AI to assist a doctor in less than 5 minutes. Cervical cancer diagnosis using AI is the future that we are looking forward to today.
Prerequisites
Before we jump into the code, here's what you'll need:
-
An understanding of Python programming and usage of Google Colab
-
Basic knowledge about deep learning and medical images.
-
Comfortable using frameworks like Tensorflow, Keras, Numpy, OpenCV, and Seaborn to handle data and build models and visualize data and performance of models
-
The cervical cancer dataset consists of images labeled corresponding to the types.
Do not stress if you are new to the deep learning world. This project breaks down complex deep-learning tasks in a simple way.
Approach
The process is aimed at developing an accurate Cancer detection CNN model in the following order:
-
Data Preprocessing: Here we have to prepare our dataset for feeding the model. We applied resizing, normalizing techniques.
-
Model design: Propose the architecture of CNN including the layers. Which would be able to extract relevant fields from the given images.
-
Training & Evaluation: Train the model and check how well the model works in real-time.
Workflow and Methodology
Let's explain this project in a sequential manner
-
We collected the dataset labeled in different types of cancer from Kaggle.
-
To improve the model performance and achieve higher accuracy, we applied different preprocessing techniques. First, we augmented the dataset to create a balanced dataset. Then we resized and normalized the images in 0 to 1 pixel values.
-
In this project, a CNN structure is developed. This will conduct the analysis on the acquired images and predict the results.
-
The model has been trained on the preprocessed dataset and later, tested on the dataset that was not used during training.
-
The evaluation of the model's performance is done by evaluating accuracy, precision, recall, confusion matrix, etc.
The methodology
-
Data Preprocessing: The images are resized to 128x128. And pixel values are normalized for uniformity and better processing speed.
-
Convolutional Layers: Multiple convolutional layers are used to compute image characteristics such as edges and texture patterns.
-
Max Pooling: Helps to downscale the size of the feature map while preserving the essential information, thus making the model faster.
-
Dense Layers: The process of classifying images after the features have been extracted. The last layer has a Softmax activation function for multi-class classification.
-
Evaluation Metrics: Use of accuracy, confusion matrix, and classification report (precision, recall, and F1 score) to evaluate the performance.
Data Collection
Data is the backbone of any such work. While carrying out cervical cancer, we used a cervical cancer dataset from Kaggle consisting of a variety of countries' cervical cell images. The data was then used to create the main training set and the validation set for training and testing purposes respectively.
Data Preparation
The images were also preprocessed by using OpenCV to re-sized the images to a standard size of 128 x 128 pixels.
Data Preparation Workflow
-
Resize Images: Adjustment of image size to a particular standard.
-
Normalization: Scale the pixel values between 0 and 1.
Code Explanation
STEP 1:
Mounting Google Drive
We mount Google Drive to access our dataset stored in the cloud.
from google.colab import drive
drive.mount('/content/drive')
Importing Libraries
This code block imports all the required libraries for this project for creating, training, and evaluating models. It also imports image processing libraries like PIL and OpenCV for handling images, and matplotlib and seaborn for data visualization. Scikit-learn utilities facilitate model evaluation using metrics such as confusion matrices.
import os
import keras
import numpy as np
from tqdm import tqdm
from keras.models import Sequential
from keras.callbacks import ModelCheckpoint
from keras.layers import Convolution2D, MaxPooling2D, ZeroPadding2D
from keras import optimizers
from keras.preprocessing import image
from PIL import Image,ImageOps
import cv2
import matplotlib.pyplot as plt
import seaborn as sns
from sklearn.metrics import confusion_matrix, classification_report
import matplotlib.pyplot as plt
import tensorflow
from tensorflow.keras import Model
from tensorflow.keras.layers import Input, BatchNormalization, ReLU, ELU, Dropout, Conv2D, Dense, MaxPool2D, AvgPool2D, GlobalAvgPool2D, Concatenate
import tensorflow as tf
import tensorflow.keras
from tensorflow.keras import models, layers
from tensorflow.keras.models import Model, model_from_json, Sequential
from tensorflow.keras.preprocessing.image import ImageDataGenerator, array_to_img, img_to_array, load_img
from tensorflow.keras.callbacks import TensorBoard
from tensorflow.keras.layers import Dense, Dropout, Activation, Flatten, Conv2D, MaxPooling2D, SeparableConv2D, UpSampling2D, BatchNormalization, Input, GlobalAveragePooling2D
from tensorflow.keras.regularizers import l2
from tensorflow.keras.optimizers import SGD, RMSprop
from tensorflow.keras.utils import to_categorical
STEP 2:
Data collection and preparation
Load Dataset
This section of code is mainly focused on arranging the paths of the dataset. It starts by guiding the program to the main folder containing the Cervical cancer Datasets located on Google Drive. After that, it defines two different paths. One for the training set and another for the validation set.
dataset='/content/drive/MyDrive/Cervical_Cancer_Datasets'
train_folder = os.path.join(dataset,"training")
test_folder = os.path.join(dataset,"validation")