- An Introduction to Self-Driving Car
- Machine Learning Algorithms and Techniques in Self-Driving Cars
- Localization for Self-Driving Cars
- Perception for Self-Driving Cars
- Hardware and Software Architecture of Self-Driving Cars
- Sensor Fusion for Self-Driving Car
- Self-Driving Car Path Prediction and Routing
- Self-Driving Car Decision-Making and Control System
- Cloud Platform for Self-Driving Cars
- Dynamic Modeling of Self-Driving Car
- Safety of Self-Driving Cars
- Testing Methods for Self-Driving System
- Operating Systems of Self-Driving Cars
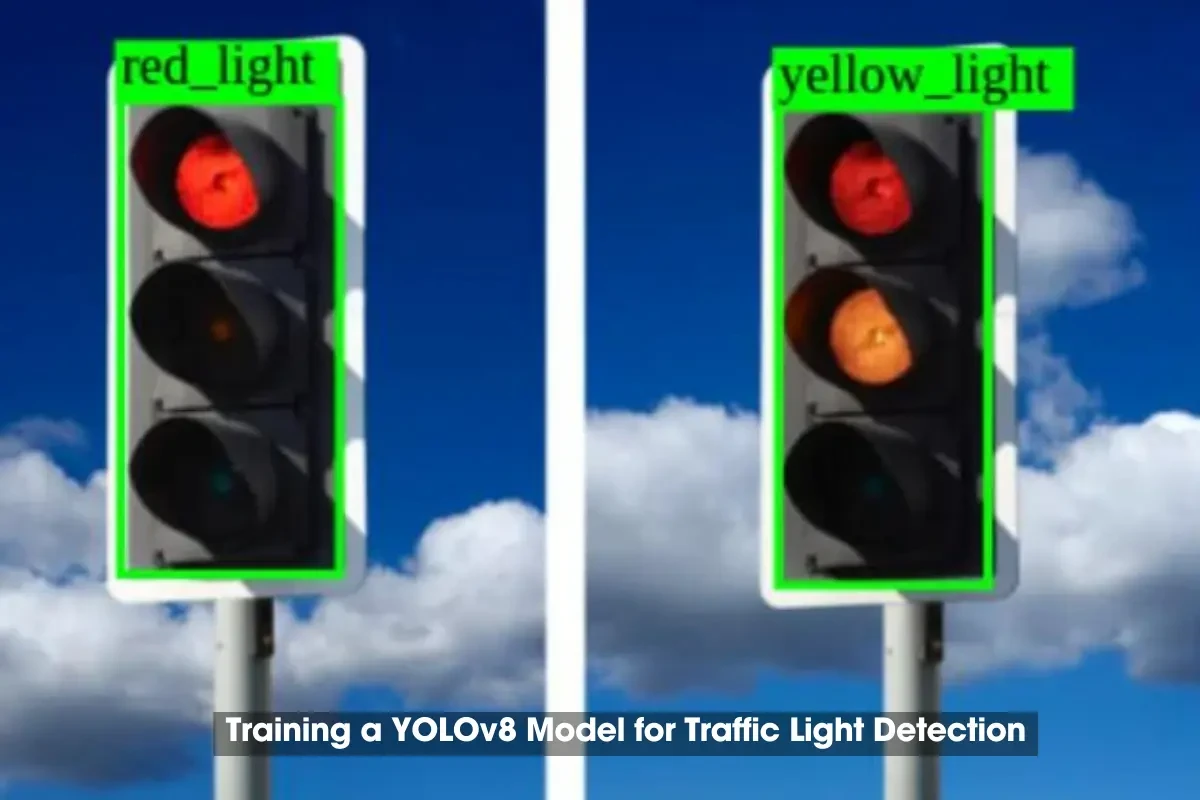
- Training a YOLOv8 Model for Traffic Light Detection
- Deployment of Self-Driving Cars
Training a YOLOv8 Model for Traffic Light Detection | Self Driving Cars
Introduction
Welcome to our thorough guide on teaching a YOLOv8 model to identify traffic lights-an important ability for self-driving automobiles. This tutorial will walk you through configuring your surroundings, custom dataset training for your model, and image and video performance testing. This article will teach you the fundamental actions to create and implement a strong traffic light detecting system regardless of your level of experience as a developer.Overview
For autonomous cars, traffic light detection is basic since it helps them to safely and effectively negotiate junctions. We can highly detect traffic lights by training a state-of- the-art object detection framework, the YOLOv8 model. You can get the whole output and code from collab. This tutorial walks over the following actions:
-
Importing Libraries
-
Checking GPU Access
-
Installing YOLOv8
-
Importing Dataset from Roboflow
-
Training the Model
-
Displaying Training Results
-
Validating the Model
-
Performing Inference on Images
-
Testing on Demo Videos
What is YOLOv8?
The most recent development of the YOLO family of models-known for their speed and accuracy in real-time object identification tasks-is YOLOv8, You Only Look Once version 8. Designed by Ultralytics, YOLOv8 brings several enhancements over its forebears: improved performance, increased accuracy, and more effective use of computer resources. YOLOv8 is meant to be flexible, which qualifies for several uses including traffic light detection for autonomous vehicles.
1. Importing the Required Libraries
First, we need to import the necessary libraries for our project.
import os
import glob
from IPython.display import Image, display
2. Checking GPU Access
To ensure we have access to the GPU, we can use the following command:
!nvidia-smi
3. Setting Up the Environment
Set up the home directory.
HOME = os.getcwd()
print(HOME)
4. Installing Ultralytics and YOLOv8 from GitHub
Clone the YOLOv8 repository and install the dependencies.
!git clone https://github.com/MuhammadMoin97/ultralytics.git
%cd {HOME}/ultralytics
!pip install -e '.[dev]'
5. Checking the YOLOv8 Installation
Ensure YOLOv8 is installed and working properly.
import ultralytics
ultralytics.checks()
6. Importing the Traffic Lights Dataset from Roboflow
We will use the Roboflow API to import and download the traffic lights dataset.
!pip install roboflow
from roboflow import Roboflow
rf = Roboflow(api_key="YOUR_ROBOFLOW_API_KEY")
project = rf.workspace("wawan-pradana").project("cinta_v2")
dataset = project.version(1).download("yolov5")
7. Training the YOLOv8 Model on the Custom Dataset
Navigate to the appropriate directory and start training the YOLOv8 model.
%cd {HOME}/ultralytics/ultralytics/yolo/v8/detect
!python train.py model=yolov8l.pt data={dataset.location}/data.yaml epochs=80 imgsz=640
8. Displaying Training Results
Confusion Matrix
Display the confusion matrix to evaluate the model's performance.
%cd {HOME}
Image(filename=f'{HOME}/runs/detect/train2/confusion_matrix.png', width=900)
Training and Validation Loss
View the training and validation loss to understand the model's learning process.
Image(filename=f'{HOME}/runs/detect/train2/results.png', width=600)
Image(filename=f'{HOME}/runs/detect/train2/val_batch0_pred.jpg', width=600)
9. Validating the Custom Model
Validate the custom-trained model on the validation dataset.
%cd {HOME}
!python val.py model='{HOME}/runs/detect/train2/weights/best.pt' data={dataset.location}/data.yaml
10. Inference with Custom Model
Test the model on test dataset images.
%cd {HOME}
!python predict.py model='{HOME}/runs/detect/train2/weights/best.pt' source='/content/ultralytics/ultralytics/yolo/v8/detect/cinTA_v2-1/test/images'
Display the test results.
import glob
from IPython.display import Image, display
for image_path in glob.glob(f'/content/ultralytics/ultralytics/yolo/v8/detect/runs/detect/train11/*.jpg')[:5]:
      display(Image(filename=image_path, width=600))
      print("\n")
11. Testing on Demo Videos
Download and Test on Demo Video 1
Download and test the model on a demo video.
!gdown "https://drive.google.com/uc?id=1rCRcTpoLWxGi26gDdpnI-Nv6t2Ybi8rA&confirm=t"
%cd {HOME}
!python predict.py model='{HOME}/runs/detect/train2/weights/best.pt' source='video1.mp4' conf=0.45
Display the demo video.
!rm "/content/result_compressed.mp4"
from IPython.display import HTML
from base64 import b64encode
import os
save_path = '/content/ultralytics/ultralytics/yolo/v8/detect/runs/detect/train12/video1.mp4'
compressed_path = "/content/result_compressed.mp4"
os.system(f"ffmpeg -i {save_path} -vcodec libx264 {compressed_path}")
mp4 = open(compressed_path,'rb').read()
data_url = "data:video/mp4;base64," + b64encode(mp4).decode()
HTML("""
<video width=400 controls>
      <source src="%s" type="video/mp4">
</video>
""" % data_url)
Download and Test on Demo Video 2
Download and test on another demo video.
!gdown "https://drive.google.com/uc?id=1Bm2XklAu83XJiP6C3-6hAEu-tzbGUv6K&confirm=t"
%cd {HOME}
!python predict.py model='{HOME}/runs/detect/train2/weights/best.pt' source='video2.mp4'
Display the demo video.
from IPython.display import HTML
from base64 import b64encode
import os
save_path = '/content/ultralytics/ultralytics/yolo/v8/detect/runs/detect/train13/video2.mp4'
compressed_path = "/content/result_compressed.mp4"
os.system(f"ffmpeg -i {save_path} -vcodec libx264 {compressed_path}")
mp4 = open(compressed_path,'rb').read()
data_url = "data:video/mp4;base64," + b64encode(mp4).decode()
HTML("""
<video width=400 controls>
<source src="%s" type="video/mp4">
</video>
""" % data_url)
!rm "/content/result_compressed.mp4"
Download and Test on Demo Video 3
Download and test on a third demo video.
!gdown "https://drive.google.com/uc?id=1PuC8imuJk3Wx-LILQVAtGw8Fuy5Kz8yR&confirm=t"
%cd {HOME}
!python predict.py model=
!python predict.py model=
!python predict.py model='{HOME}/runs/detect/train2/weights/best.pt' source='video3.mp4'
Display the demo video.
!rm "/content/result_compressed.mp4"
from IPython.display from base64 import b64encode import os
save_path = '/content/ultralytics/ultralytics/yolo/v8/detect/runs/detect/train14/video3.mp4'
compressed_path = "/content/result_compressed.mp4"
os.system(f
os.system(f"ffmpeg -i {save_path} -vcodec libx264 {compressed_path}")
mp4 = open(compressed_path,'rb').read()
data_url = "data:video/mp4;base64," + b64encode(mp4).decode()
HTML("""
<video width=400 controls>
      <source src="%s" type="video/mp4">
</video>
""" % data_url)
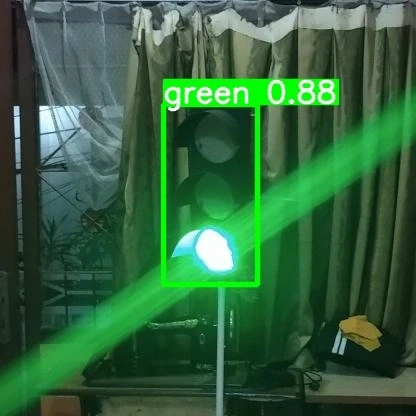
Output Image:

.webp)
Future Work:
Although this lesson offers a strong basis for traffic light recognition with YOLOv8, several areas of interest remain:
- Experimenting with many model architectures and hyperparameters will help to raise detection accuracy.
- Real-time Inference: Use real-time detection for connection with systems of autonomous driving cars.
- Extend the model to find other traffic-related objects including road signs, vehicles, and pedestrians.
- Deploy the trained model for scalable solutions either on edge devices or in the cloud.
Conclusion
Following this tutorial will help you to effectively test and train a YOLOv8 traffic light detecting model. Developing strong self-driving car systems depends on this really vital stage. Your autonomous car, with a well-trained model, can effectively identify and react to traffic lights, therefore guaranteeing safer navigation.
